3D Print Nozzle too high after replacing the build plate surface
I feel like a fool, but hopefully if this happens to someone else, this can help them. TLDR: Adjust your Z axis limit switch after replacing your build plate surface.
Backstory
I have a Voxelab Aquila C2 which comes with a glass build plate. For the most part it’s a decent first printer (especially after some upgrades). Eventually I found the glass bed to be a bit unreliable for adhesion. So I started using masking tape and glue sticks. Afterwards I took a bit of a break from 3D printing.
I come back months later, and I want to print some parts, but I’m not happy with how the surface looks uneven with either the tape, or blotches of glue.
It’s time to fix this problem properly.
So I order a PEI plate on Aliexpress. A week or so later it arrives, so I try printing a Benchy.
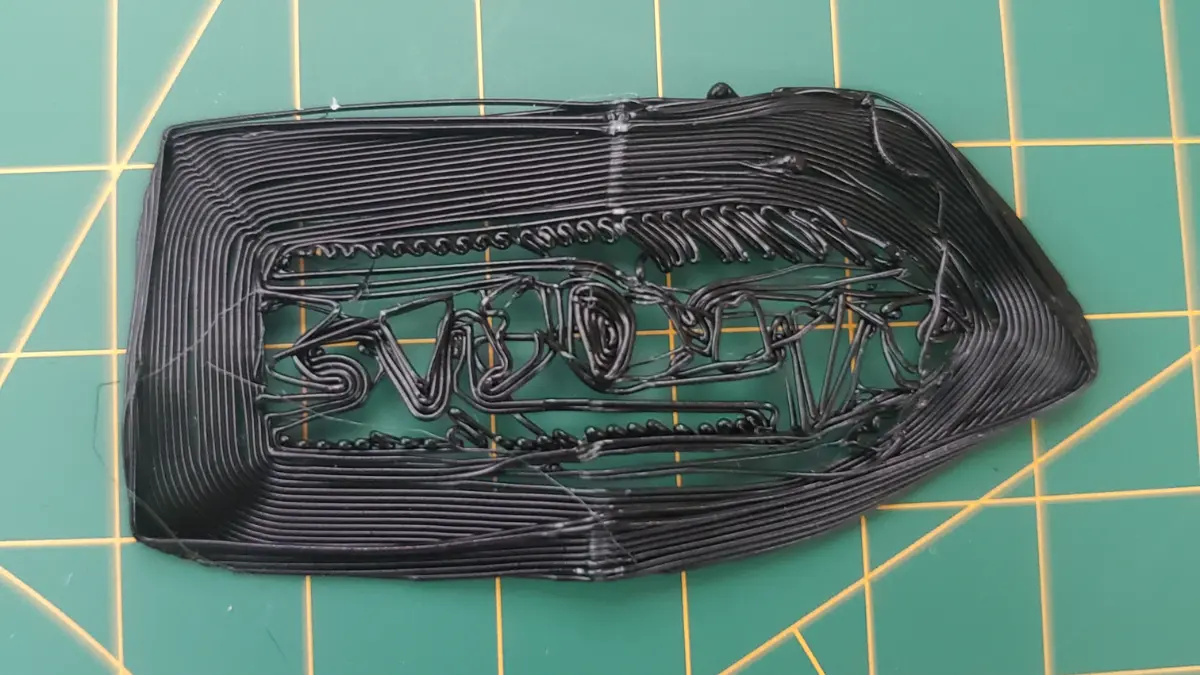
It didn’t turn out so great.
I have a look at it while it’s printing, the nozzle is clearly too high. I begin problem solving.
Suspect 1: BLTouch has gotten loose
My BL Touch is mounted using a couple of M3 bolts, perhaps they’ve come loose, causing the printer to think the nozzle is lower than it actually is?
I checked, they were pretty tight.
It probably wasn’t that.
Suspect 2: My Start G Code
My Start G Code is mostly the result of me searching “how to extrude a little bit before print gcode” with minor modification.
It looks like this:
M140 S{material_bed_temperature} ; start heating the bed to what is set in Cura
M104 S{material_print_temperature} T0 ; start heating T0 to what is set in Cura
G28 ; Home
M117 Auto bed-levelling
G29 ; Auto bed-level
G1 Z15.0 F6000 ;Move z up15mm
G92 E0 ; reset extruder
G1 E20 ; extrude 20mm filament
G92 E0 ; reset extruder
G1 Z1.0 F3000 ; move z up little to prevent scratching of surface
G1 X0.1 Y20 Z0.3 F5000.0 ; move to start-line position
M117 Purging
G1 X0.1 Y200.0 Z0.3 F1500.0 E15 ; draw 1st line
G1 X0.4 Y200.0 Z0.3 F5000.0 ; move to side a little
G1 X0.4 Y20 Z0.3 F1500.0 E30 ; draw 2nd line
G92 E0 ; reset extruder
G1 Z1.0 F3000 ; move z up little to prevent scratching of surface
M117 Start printing
I thought at the end when I move Z up 1mm that set my build to start at 1mm instead of 0. And that the use of tape and glue made just enough height difference to let the filament adhere.
So I simplify it:
M140 S{material_bed_temperature} ; start heating the bed to what is set in Cura
M104 S{material_print_temperature} T0 ; start heating T0 to what is set in Cura
G28 ; Home
M117 Auto bed-levelling
G29 ; Auto bed-level
It still doesn’t work.
Suspect 3: Probe Z Offset
This is the one I was avoiding. The probe Z offset is the difference between the height of the BL Touch probe and the nozzle. Because the BL Touch hasn’t moved, the Z offset shouldn’t change. The print surface shouldn’t affect it. But I was all out of options.
I checked my probe offset values on the printer, and in my Marlin code, they were the same: #define NOZZLE_TO_PROBE_OFFSET { -51, -13, -1.15 }.
Maybe the nozzle needs ot be lowered. So I do that on the printer, but it wont go lower than 0. That’s weird, when I modified the firmware for BL Touch I disabled the software endstop for the Z axis (it let’s you crash the nozzle straight into the build surface). Sure enough MIN_SOFTWARE_ENDSTOP_Z was commented out in my code.
So I’m scratching my head, I really don’t know what to do I can’t find my new Z offset if I can’t test it.
Then it hit me.
Suspect 4: Z Axis Limit Switch
Or more the X axis bar hit the Z axis limit switch mounting brace.
The Z axis limit switch is used to determine what 0 is on the Z axis. After installing the BL Touch I set Marlin to use the BL Touch to determine where 0 is. But I never physically removed the switch.
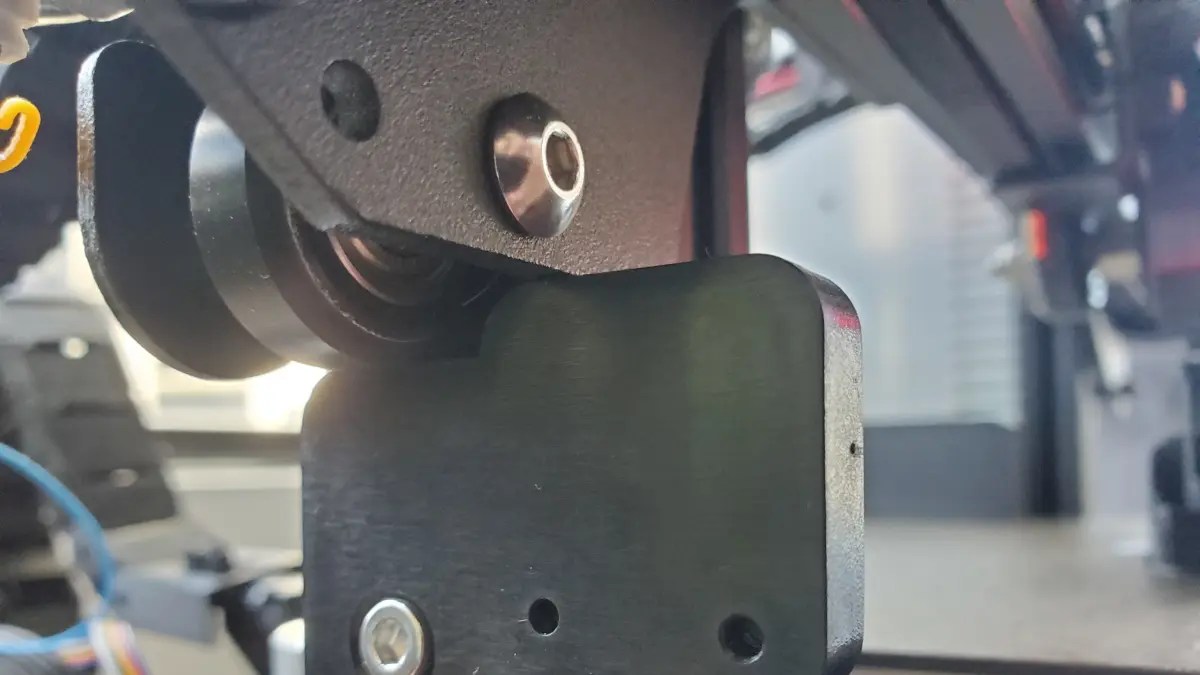
There it is, the mounting bracket blocked the Z axis from going any lower. Removed it, problem solved.