Gaggia Classic PID Mod
Continuing the modding mood I’ve been in lately, I modded my espresso machine - the Gaggia Classic by adding a PID controller.
Why
The Gaggia Classic is a lovely espresso machine with a couple of quirks, one of them being it’s boiler temperature has pretty large swings. A relatively simple fix for this is adding a PID controller which regulates the power given to the boiler based on a temperature reading.
Before Getting Started
This involves mains power which if you’re not careful will kill you. Scrutinise every step, test every connection, test every connection with every switch combination. Please don’t blindly follow this guide.
If you’re not confident you can do this safely, talk to someone who can. An alternative way to get consistent shots on the Gaggia Classic is temperature surfing.
How to
This isn’t an in depth how to, that’s been covered very well by robert kujawa on Youtube. This are more additional tips.
Parts
Robert includes the parts he used in his video, but some of them ran out of stock, this is what I used.
4mm2 2m Silicone Wire - 2m is about the perfect length if you only want to use one wire for the entire build, just a little bit more is probably advisable if you want to do a dual ssr mod.
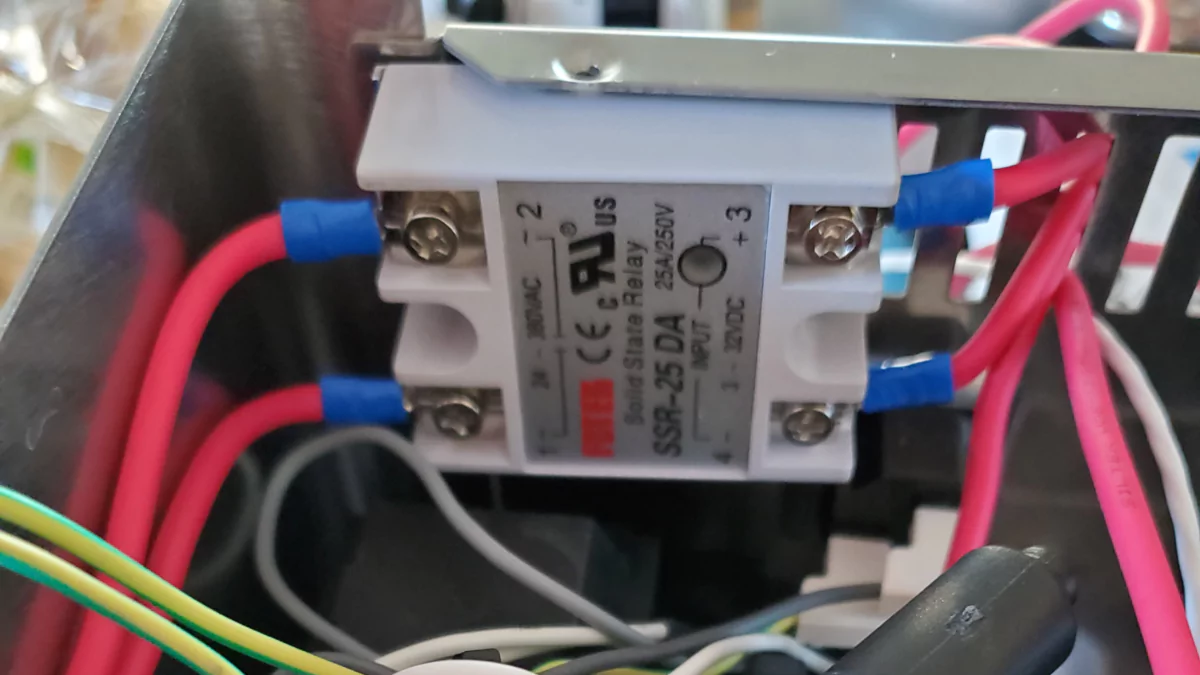
Solid State Relay 25DA - buy two if you want to do the dual SSR mod. The specifications are as follows:
- Input voltage: 3-32V DC
- Output voltage: 24-380V AC
- Output current: 25A
- Working voltage: 250V
Terminal Connector Crimping Set. I didn’t pay attention to the gauge of the wires I was working with, this was fine for the silicone wire, but not very useful for the temperature sensor.
PT100 Temperature Sensor (M4 Screw 750mm)
XMT7100 Enclosure. There are a few XMT7100 enclosures available online, this is one I remixed based on the work of Thrmlstudios and rmpca. As of writing this I’m still waiting for my replacement hot end to arrive, so I haven’t actually printed this yet.
Edit: 2022-06-05
I printed the enclosure, one thing I found was I forgot my model mounts on the left side for the machine, the other thing I hadn’t taken into account was the hole at the back of the enclosure for the wires is a little small given my reliance on heavy wires. (I’ve since expanded the hole in the linked model.)
However it works, and looks like so:
Crimping tool, nuts, bolts. I just had these lying around but any hardware store will have them.
Steps
Follow Robert Kujawa’s video on Youtube, the following are supplementary tips:
- You don’t need to fully remove the boiler, it’s not too hard to attach the temperature sensor while it’s still in the machine.
- The colours Gaggia uses vary from model to model, region to region, in my case the “blue” neutral cable was white.
- On newer models of the Classic you can attach the SSR to the top left corner with a bolt through the grill, like so:
- The PID wiring looks like this (specific to the XMT7100):
Wire Connection Active (Hot/Live/Line) (Brew switch brown wire) PID 1 Neutral (Mains socket) PID 2 Temperature Sensor PT100 White PID 6 and PID 7 Temperature Sensor PT100 Red PID 8 SSR 4 (-) PID 9 SSR 3 (+) PID 10 Gaggia thermostat cables (ones removed during PT100 installation) SSR 1 and SSR 2 (order doesn’t matter)
Edit 2023-01-29
I’ve updated the diagram to use an ascii diagram, however the original diagram still lives here
.------------ THERMOSTAT CABLE (PINK) -----
|
| .------ THERMOSTAT CABLE (GREY) -----
| |
| |
| |
| |
| |
| |
________|_____|________
| | | |
| | | |
___________ | 1~ * * ~2 |
| | | |
| | | SSR |
| BOILER | | |
| | | 4- * * +3 |
| | | | | |
| *--------------. |_______|_____|_______|
| | | | |
| | | | |
|__________| | | |
| | |
| | |
.---- PT100 RED TO PID 8 ------------------------------. | |
| | | |
.---- PT100 WHITE TO PID 6 AND 7 ----. | .---------------- SSR 4 [-] TO PID 9 ---. |
| | | |
| | | .------- SSR 3 [+] TO PID 10 --------.
.--------. | | |
| | | | |
| | | | |
| | | | |
____|________|________|________|________|____
| | | | | | | | | | |
| * 6 | * 7 | * 8 | * 9 | * 10 |
|________|________|________|________|________|
| | | | | |
| * 1 | * 2 | * 3 | * 4 | * 5 |
|___|____|___|____|________|________|________|
| | XMT7100 PID CONTROLLER
| |
| |
.------ HOT (BREW BROWN WIRE) TO PID 1 -------. |
| |
| |
.---------.----|----. .--NEUTRAL TO PID 2 -.
| .---. | .---. | |
| .---. | .---. | |
.---------.---------. | __________
| .---. | .---. | | / |
| .---. | .---. | | / .---. |
.---------.---------. | / .---. |
POWER SWITCH (AS | / |
SEEN FROM INSIDE | | |
THE MACHINE) | | |
| | .---. | MAINS (AS SEEN
| | .---. | FROM INSIDE
| | | THE MACHINE)
| | |
| \ |
| \ .---. |
| \ .---. |
| \____|_____|
| |
| |
.-----------------.
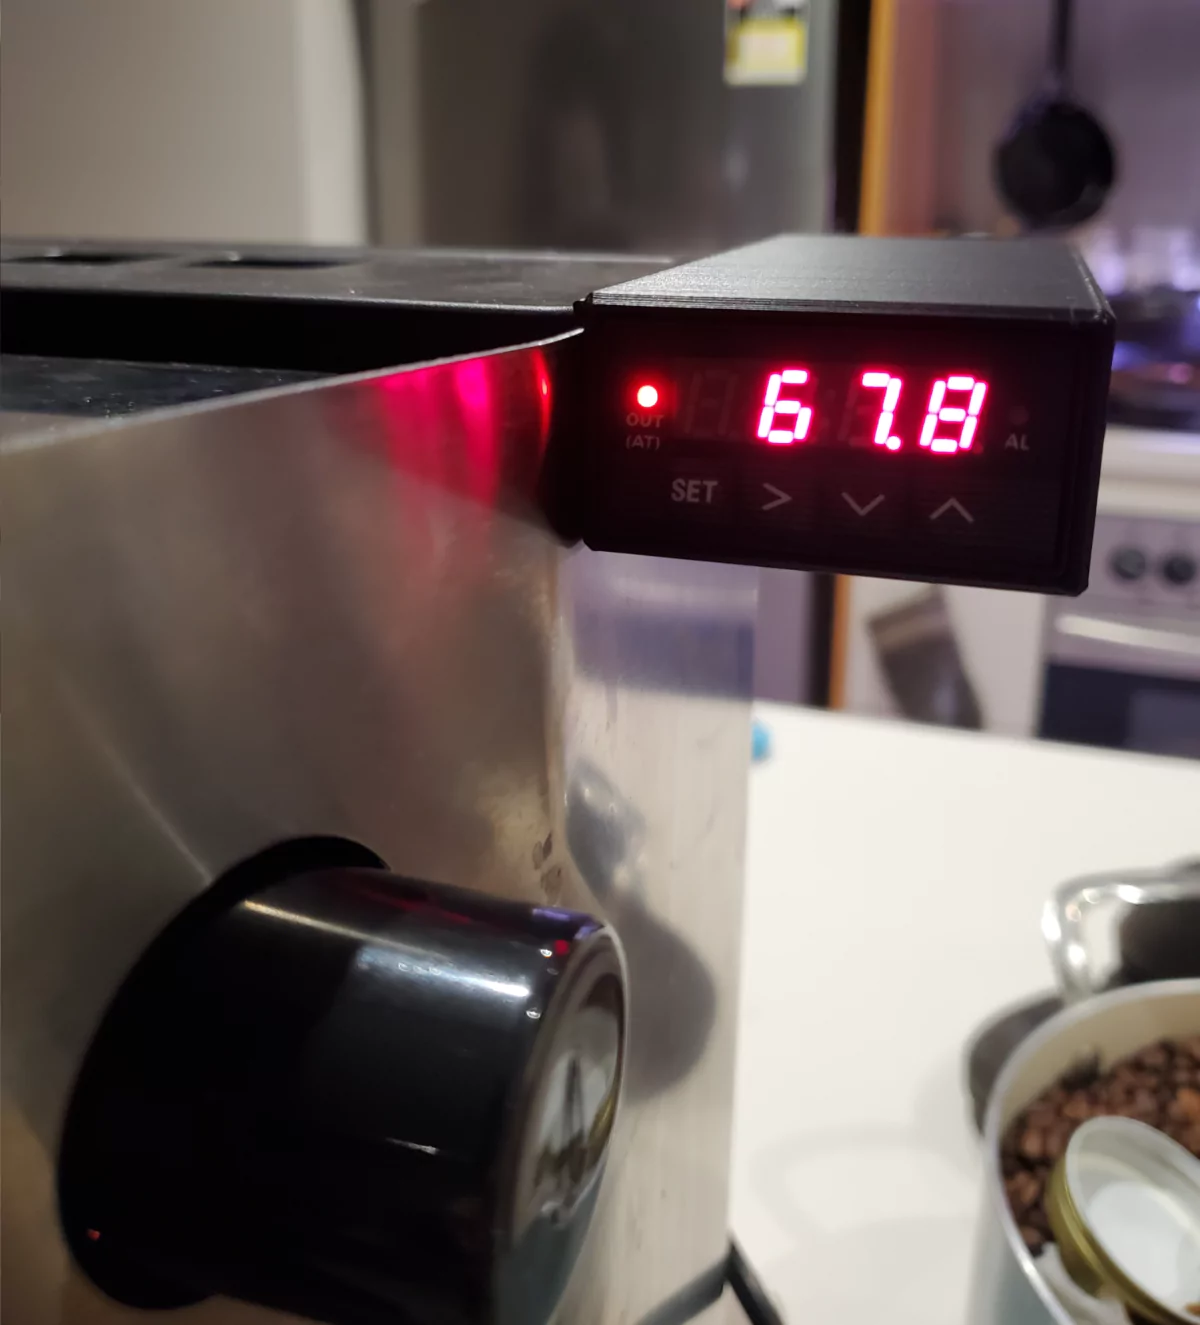
Setting Up the PID
After completing the mod I turned on my espresso machine, the steam light immediately went on and the machine got much hotter than it usually does.
It’s important to check your PID settings - it changes from seller to seller.
Refer to your included manual but for my model I had to update a few things.
Fist thing is to get into the menu by pressing set and entering 0089.
My input type (inty) was set to K for KTC, I set it to P10.0 for Pt100 RTD with decimals.
My CorF labelled “Engineering un selection” was labelled 1 for degrees F, I set it to 0 for degrees
Under the other menu (password 0001), I have my set value set as 103 degrees C (there’s a pretty drastic drop in temperature between boiler and group head).
Lastly auto tune the PID, hold down > for about 3 seconds, the OUT light will start flashing, let it be until it stops flashing at that rate (about 10 minutes).